- Audio Tools
- PDF Tools

In this guide, you will see how to use File Lock for Mac step by step. If you haven't installed this software, please Download File Lock for Mac to get start.

Step 1 - Create a vault
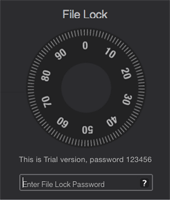
When you first launch this program, it will ask you to set password for this software, a trial version only allow use "123456" as password. And then create a vault, this vault will store your all locked files(with encrypted format).

Step 2 - Add files or folders
Go to "Primary Vault" - "All Files", click below button to add files or folders.


Step 3 - Switch Visible/Invisible status.
Switch Visible/Invisible status. The invisible files and folders will disappear from Finder, and can not be found after search. No one can open, modify, delete or copy your hidden files.

Step 4 - Secure Notes
Protect sensitive text data here, such as password, credit card info and so on.

Step 5 - Lock software
Click "Lock Me" button to lock this software.